 Bal's Quake Mapping Tips & Tricks
Bal's Quake Mapping Tips & Tricks Here's a small list of tips and tricks that I use everyday while mapping, and that I often repeat in the Quake Mapping Discord.
I've tried to organize them as best as possible, but there's no real structure to this list, it's just lots of little things I learned over the years that I feel could be helpful to others.
This list expects that you're using Trenchbroom and ericw-tools, make sure to also check their respective documentation to learn more about their many features :
Here's a summary of what's in this article :
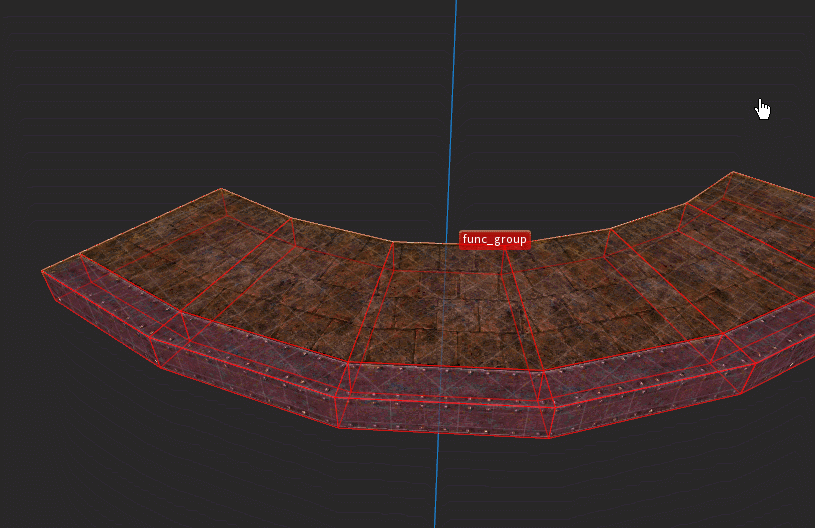
Using Func_Groups
Func_groups are not real entities, the compilers handle them like regular worldspawn brushes, but using them offer many advantages :
- You can apply various compiler settings on them, like _phong or _minlight and such, to change how these brushes will look in game.
- Like any other brush-based entity, you can double click on any brush of a func_group to select the whole group.
By making most of the brushes in your map func_groups (or func_detail, etc.), you can organize them and select large chunks of your map much faster to iterate on your work, or move stuff around etc.
I highly recommend creating a hotkey to turn your current brush selection into a func_group (I use ctrl-g).
I highly recommend creating a hotkey to turn your current brush selection into a func_group (I use ctrl-g).
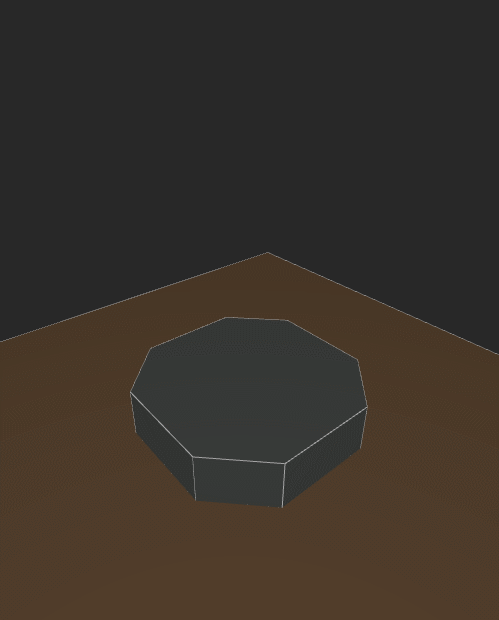
Quick Func_Detail Explanation

I won't go into too much detail on how exactly func_detail works here, but just give a general idea of how to use them.
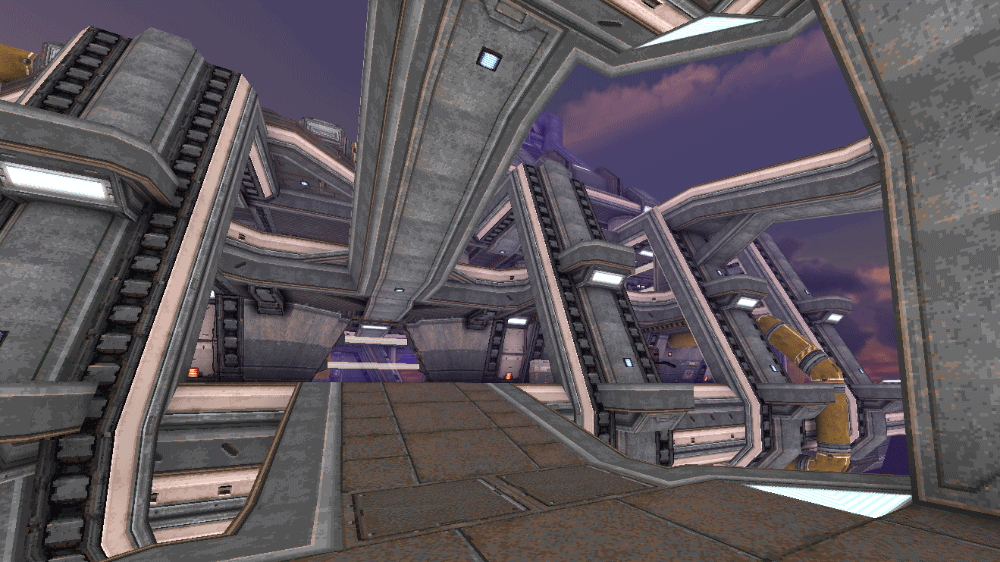
Any brush that is made func_detail will basically be ignored by vis.exe, thus making vis much faster. This means your map is a bit less optimized but will compile faster.
If you don't use func_detail and make complex maps, your vis time will skyrocket, it can take up to multiple days to compile even on a modern computer. With some smart func_detail usage you can keep these vis compile times down to under a minute in most cases.
So when should you use func_detail :
- Any brushes that don't block visibility, such as small details and such
- Organic surfaces that have lots of angles, such as terrain as these will slow down vis quite a lot
When should you NOT use func_detail :
- Anything touching the outside of your map, func_detail will not seal your map, your map will end up leaking at the qbsp stage.
- Any large walls and structures that will occlude visibility, you want to keep these as worldspawn so vis has some stuff to work with.
The images on the side show two of my maps, with and without func_detail visible.
I highly recommend creating a hotkey to create func_detail, and also a hotkey to toggle their visibility on and off, you can find this in the preference as "Tags > Toggle Detail Visibility".
I highly recommend creating a hotkey to create func_detail, and also a hotkey to toggle their visibility on and off, you can find this in the preference as "Tags > Toggle Detail Visibility".
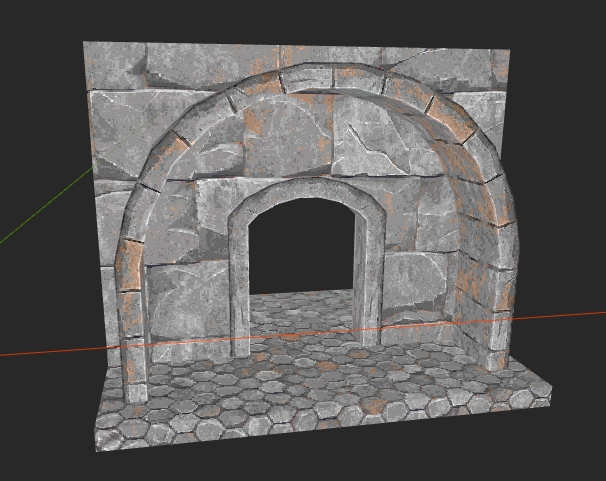
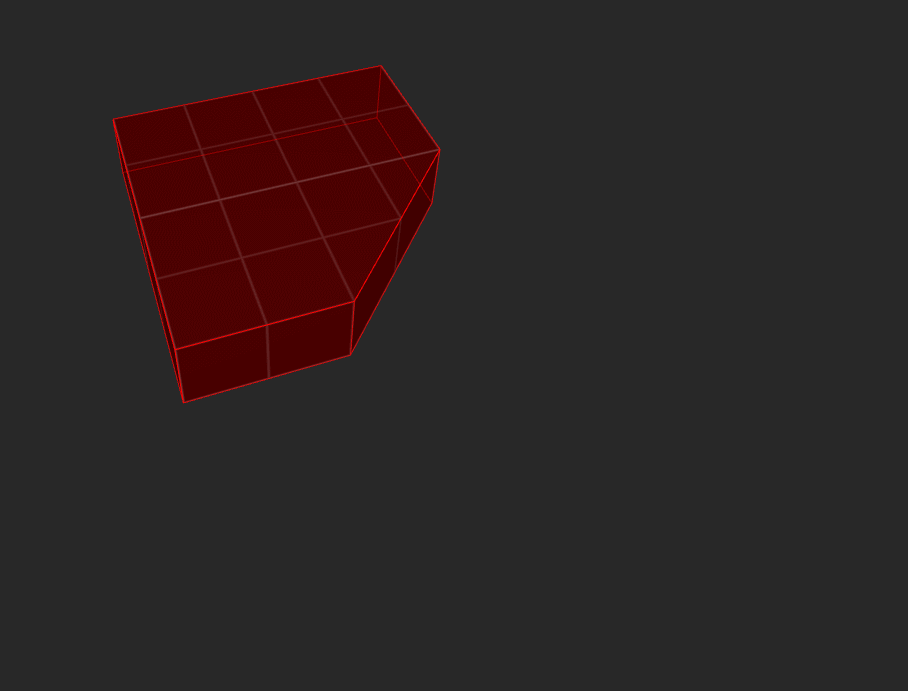
Curve Texture Alignment Technique
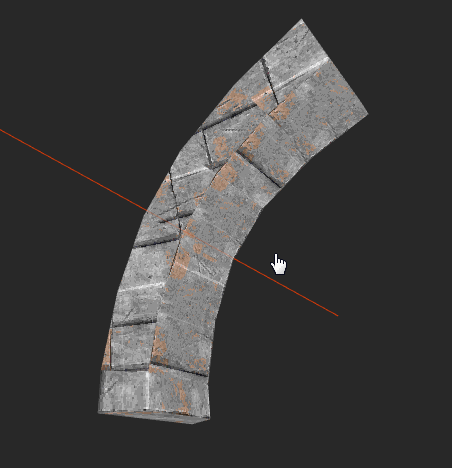
When trying to align trim textures along curved brushes, it can be quite time consuming if you try to do it with the regular texture alignment tools.
Instead you can just align the texture quickly on the inside of the curve, and then align those faces to the outside faces to get close to perfect alignment in a few easy clicks.
In the example on the side, I just shift+left-click the first face to select it, and then hold shift+alt+left-click and zigzag across the faces to align the textures across the whole arch.
2D View Quick Face Move
This is an often ignored feature, as people don't use the 2D view much, but you can slide faces by holding shift+alt+left-click drag in the 2D view. This is the equivalent of selecting brush Faces in the 3D View and moving them, but is much faster to do.
This works on many faces if they are coplanar, and will properly preserve texture alignment if UV lock is on.
I use it a lot when extruding out trims and moving them to 45degree angles etc. and is one of the reasons I recommend always having a 2D view visible.
This works on many faces if they are coplanar, and will properly preserve texture alignment if UV lock is on.
I use it a lot when extruding out trims and moving them to 45degree angles etc. and is one of the reasons I recommend always having a 2D view visible.
Using UV Lock Intelligently
UV lock is a powerful feature, and even more so if you think about the order in which you build things.
For example in this gif I did the texture alignment of the trims when the brushes were flat, then used vertex editing with UV lock activated to turn them into a slope, all the while keeping perfect texture alignment on all the trims. If I had tried to do the texture alignment on the final result, it would've been much more time consuming.
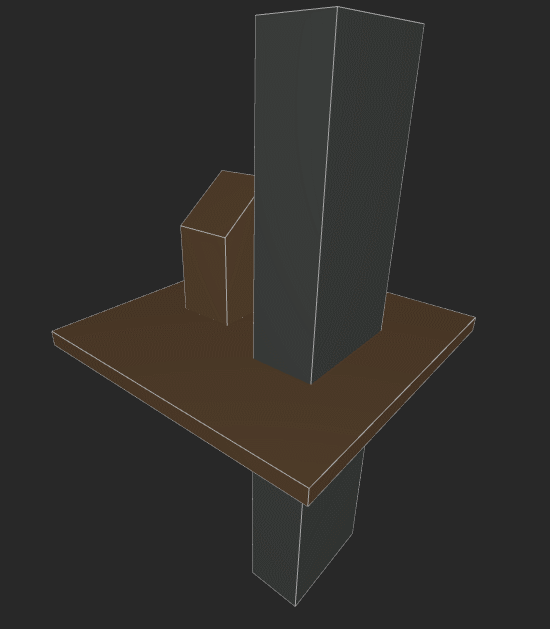
Convex Merge
Convex Merge lets you combine multiple selected brushes together into a single brush, but it also lets you create a new brush from a selection of faces. This is useful in so many situations, for example here I show how to quickly build a pillar with an inset section with just a few clicks, doing this through vertex editing would be a lot more time consuming
Convex Merge is findable in Edit > CSG > Convex Merge, the default hotkey is not great so I highly recommend setting it to something easy to access (I have it on G).
Convex Merge is findable in Edit > CSG > Convex Merge, the default hotkey is not great so I highly recommend setting it to something easy to access (I have it on G).
Alternate Brush Extrude
The regular brush extrude will come out along the shape of the original brush, which is what we want in most cases, but people often ask if instead they can extrude a new brush that keeps rectangular faces on its sides.
This is possible using the Brush Tool (B hotkey). Just activate it, double click on the face you want to extrude, shift+left-click drag to extrude it, and press enter to create the new brush. This is obviously longer to do than a regular extrude, but can be handy at times.
This is possible using the Brush Tool (B hotkey). Just activate it, double click on the face you want to extrude, shift+left-click drag to extrude it, and press enter to create the new brush. This is obviously longer to do than a regular extrude, but can be handy at times.
Vertex Extrude

It is possible to add extra vertices to a brush, to do this, just select the brush, go to vertex edit mode, hold shift and hover your cursor over the brush, you'll see a point appear, which you can pull out to add it to the brush (you'll have to also hold alt if you want to pull it out vertically)
This is quite handy to make spikes, or to work on organic brushes like rocks and natural terrain.
This is quite handy to make spikes, or to work on organic brushes like rocks and natural terrain.
Double-Click Clipping Plane
We all know the Clip tool, but many people ignore that when using it, you can double click on any face to align the clipping plane to it. This makes it really quick to trim stuff off using the faces that are already present around the brush you're editing.
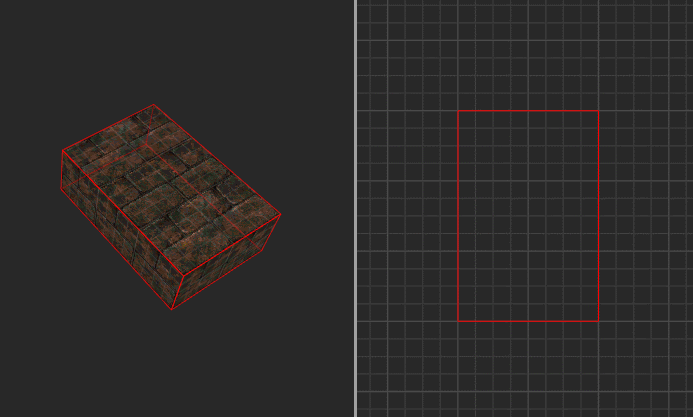
45 Degrees Approximations

Building only stuff that is aligned to the grid gets boring, and we all want to build stuff that is rotated 45 degrees sometimes. The problem with this, is that you quickly end up with brushes that are no longer on-grid.
Because of this, we use an approximation to have brushes that look like they're the same size when rotated, but stay on-grid.
On the image to the side, you can see three trims.
Because of this, we use an approximation to have brushes that look like they're the same size when rotated, but stay on-grid.
On the image to the side, you can see three trims.
- On the left, no effort was put to preserve the size of the trim, this looks ugly as it's not the same size.
- On the middle, the trim was rotated 45 degrees and placed precisely, it looks good but if you look at the grid, the outer points are no longer aligned, which will makes it really hard to work with.
- On the right, we use an approximation, where we cut off the trim so it stays on-grid, but still looks as close as possible to the middle position.
Another image example here, the left square was rotated 45 degrees, so it ends up being off-grid, but our approximation to the right is on grid and looks about the same.
You can see here that our 4 grid square becomes a 3 grid (diagonally) square once rotated, these are the numbers to keep in mind when wanting to build complex 45 degree structures.
@Markie has a video going over more details on building stuff at 45 degrees here.
Hotkeys for Drop-down Lists
You can create hotkeys that open up small drop-down lists, this is especially useful for quickly creating func or trigger entities. To do this just assign a hotkey to "Tags > Turn Selection" into Func and "Tags > Turn Selection into Trigger" in the preferences.
You can go even further and also do this for different func_detail types, I have all these set to Alt-T (triggers) Alt-F (funcs) Alt-D (details).
You can go even further and also do this for different func_detail types, I have all these set to Alt-T (triggers) Alt-F (funcs) Alt-D (details).
Increase / Decrease Grid Size Hotkeys
By default Trenchbroom uses the number keys for setting the Grid size to a specific value.
This is fine but I quickly realized it felt clunky to me and that I prefer having just two hotkeys to increase or decrease the Grid size, so I went and rebound the 1 and 2 keys to do exactly this.
This is really a matter of preference, and I know not everyone will like this setup, but it feels much more fluid to me. I kept the remaining number keys by default, but I almost never use them anymore.
Compiling with "-dirtdebug"
Sometimes compiling light in your map becomes too long when you just want to test stuff.
If you don't run light.exe at all, your map becomes full-bright which makes it really hard to read what is going on.
But if you compile light with the -dirtdebug option, it'll be full-bright, but with an ambient-occlusion pass, which will make your map look much nicer for testing purposes.
Image on the left shows with and without this option activated.
Omit layers
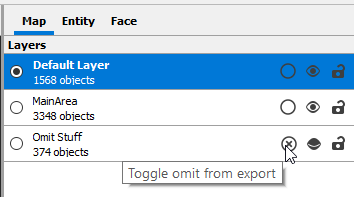
If you want certain parts of your maps not to be compiled, you can set individual layers to "omit" by clicking on the empty circle in the Layers panel. Stuff you put in these layers will not show up in the map, great for storing prefabs, or for temporarily removing pieces of your map to iterate faster.
Watch out! This will only work if you're using the Trenchbroom compiling interface.
Watch out! This will only work if you're using the Trenchbroom compiling interface.
Replacing Missing Textures in Trenchbroom
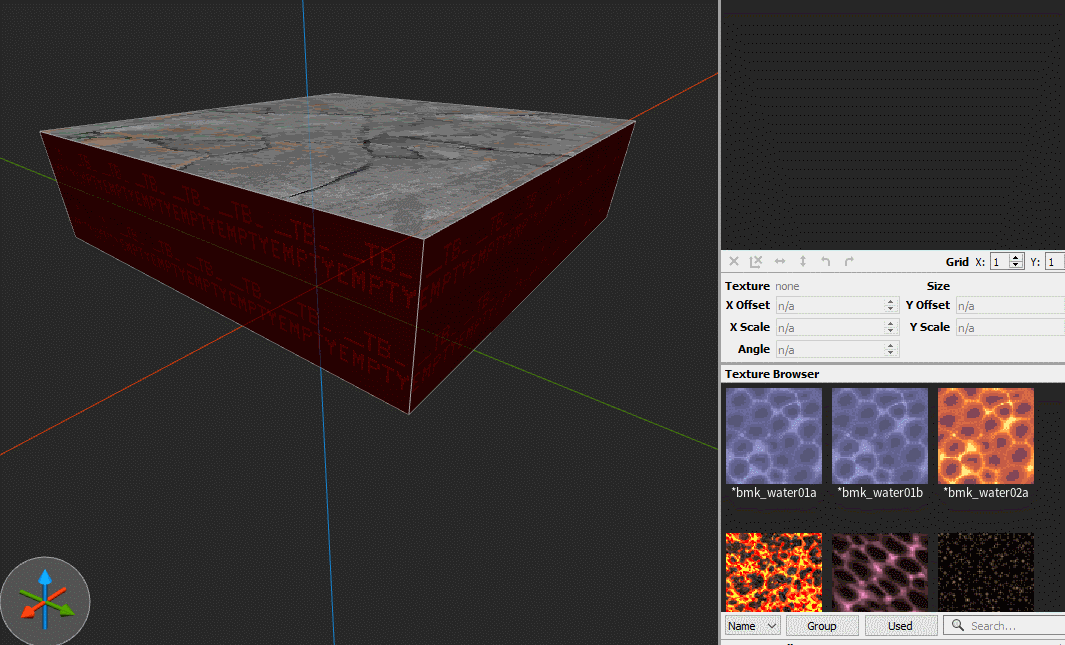
Trenchbroom uses a mysterious "__TB_empty" value for faces with no textures, and it can be awkward to find and replace these without using a text editor.
By adding a texture with this name to one of your texture wads, it becomes simple to find them and replace them!
In the gif here, I select one of these faces, right click on it to reveal the __TB_empty texture I created in the texture browser, right click on it to select all faces that have it applied, and then replace it with a texture I want.
Check tbempty_wad.zip attached to this article to get the texture I use here.
In-Game Hotkeys
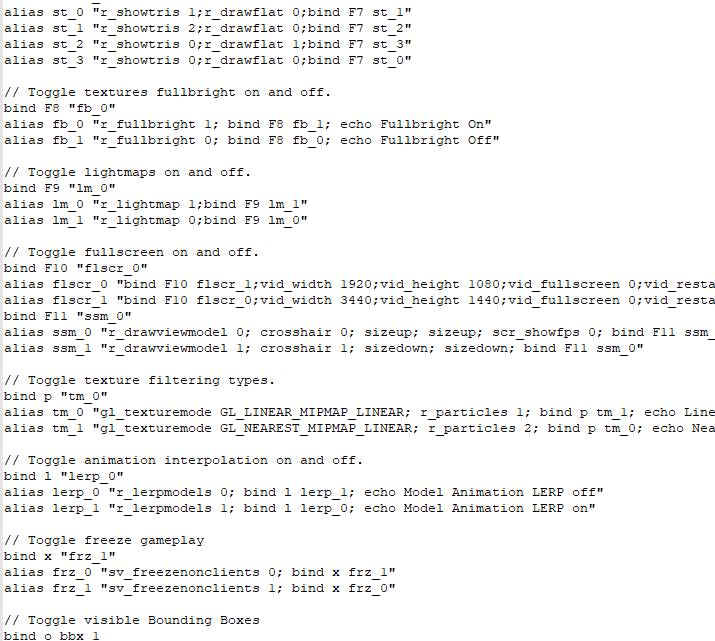
Mapping doesn't only happen in the editor, testing and flying around your map in-game are also an important part of the process. To help with this, I encourage you to have a complete config file with useful hotkeys for mapping.
Check balmapping_cfg.zip attached to this article to see a simplified version of my config. You can combine these to your own config file, or execute from the console using the "exec" command.
It uses all the F-keys to have easy access to lots of useful commands such as
Check balmapping_cfg.zip attached to this article to see a simplified version of my config. You can combine these to your own config file, or execute from the console using the "exec" command.
It uses all the F-keys to have easy access to lots of useful commands such as
- Cheat modes (god / impulse 9 / notarget etc.)
- Noclip
- Speed up time and movement (very useful combined with noclip when you need to zoom around the map)
- Freeze time (great for taking gameplay screenshots)
- Visual toggles for lightmaps, showtris, etc.
And many more, most are described in the cfg.
That's it, hopefully some of you will discover some new techniques you find useful.
If I come up with new tricks I feel are worth sharing, I'll update this article or mention them in the thread.
If you have any questions about anything mentioned here, feel free to ask them in the thread. Please also don't hesitate to share your own techniques if you feel they are relevant.
You can also contact me on the Quake Mapping Discord if needed.
- @Bal
Last edited:

") Maybe even go through the rationale for some of the changes you've made over the default TB key bindings. Like, it wasn't immediately obvious to me, why "hide textures" was so important to have a shortcut bound for it, for example.
Maybe even go through the rationale for some of the changes you've made over the default TB key bindings. Like, it wasn't immediately obvious to me, why "hide textures" was so important to have a shortcut bound for it, for example.